Anniversary Ticker

Daisypath - Personal pictureDaisypath Anniversary tickers

November 28, 2011

Thanksgiving Break 2011

We had our first Thanksgiving on the Jensen side this year. My assignment was to bring the STUFFING -------------------> This was my reaction!! I had always helped my Dad make it and knew it was a BIG part of Thanksgiving. You HAVE to have your STUFFING! Then it crossed my mind what if they don't like it? What if i make it wrong? What if it is just gross? What if I burn it? and the list goes on and on..... So i did some googling and made some phone calls or call.. haha ( my Dad is not good with recipes he just cooks.. )  FINALLY found one that sounded decent. This one....
Makes 18 (3/4-cup) servings.
Prep Time: 15 minutes
Cook Time: 40 minutes
1 cup (2 sticks) butter
2 cups chopped celery
1 cup chopped onion
2 teaspoons Thyme Leaves
1 1/2 teaspoons Poultry Seasoning
1 teaspoon seasoned salt
1/2 teaspoon Black Pepper, Ground
12 cups dry unseasoned bread cubes
4 cups chicken broth
 I also added FRESH sage leaves
1. Preheat oven to 375°F. Melt butter in large skillet on medium heat. Add celery and onion; cook and stir 5 minutes. Stir in thyme, poultry seasoning, seasoned salt and pepper.
2. Place bread cubes in large bowl. Add celery mixture and broth; toss gently until well mixed. Spoon into lightly greased 13x9-inch baking dish.
3. Bake 35 minutes or until heated through and lightly browned.

 Of coarse i was at the store the night before.. which by the way is the BLACK FRIDAY of grocery stores!! Trying to find the items i don't usually have in my kitchen was a NIGHTMARE!! There was the WONDERFUL lady who was searching for the exact same thing as me. When i finally gave up and was going to figure out how to make it without it she found it and chased me down three aisles trying to get my attention to hand me one. Completely made my night!
Because I was making it for about 30 people I doubled it so i took it out at 35 min and fluffed it and put it back in.. I figured since it was on a lower heat that it would be ok... It turned out a LITTLE more done than i was planning but i did NOT burn it. Lucky Nate got home from his Turkey bowl just in time for clean up and the house smelling of yummy thanksgiving stuffing.


After when we finally got home we finished watching the Harry Potter we had been working on for like 3 days! It was around 11. Black Friday shopping was only an hour away.... Nate was exhausted from waking up for the Turkey Bowl but i just couldn't sleep! What i should have done was just gone! But instead i starred at the ceiling hahahah We got up and had breakfast at Mimi's Cafe and went to Kohls for BLACK FRIDAY DEALS they still had EVERYTHING i was looking for and also a BIG giant LINE! We saved like 157 or something like that...  NOT BAD :)


Since we shared our Thanksgiving dinner with some many people it means not very many leftovers. So Nate wanted us to bake a Turkey... Once again the same type of fear.. I have VERY high expectations of my Turkey... Dry Turkey is not ok... So we bought a BUTTERBALL Turkey and a Turkey Bag and cooked it for about 4 hours ( according to what it said on the package) It was PERFECT!!! I was so excited that my FIRST turkey turned out soooooo good!


Nate FINALLY let me put up the Christmas decorations! You would think i would learn after the 3 years of begging that it doesn't happen until the day after Thanksgiving and i just need to DEAL... But NOPE. :) Maybe someday.... But i doubt it

November 10, 2011

My 21st Birthday!


November 2nd how we meet again... you seem to show up once a year around the same time...( imagine that). Whelp its birthday madness again and here is how we celebrated! Brianna turned 6 so on Tuesday she had a birthday party at Chuck E Cheese, spoiled little thing enjoyed every second of it! Nate and I ( mostly Nate he picked it out) gave her a hot wheels car play set. THEN.... Wednesday the REAL birthday i got to work to have a fun decorated desk thanks to some awesome co-workers!

 After work I headed home and worked on my cake for a few min until Janet and the boys stopped by the say Happy Birthday. Soon after that Nate came home and we put another coat of finish on of table (yes we are still working on it....) We got ready and headed to dinner Macaroni Grill YUM :) We ended the night with some Cold Stone ice cream the best kind EVER Cheesecake Fantasy :) and the movie Tangled. Best part of the whole day though??? My INCREDIBLE birthday present that my WONDERFUL AMAZING husband got me!
My Beautiful kitchen Aid!!!


Saturday Nate and I decided to have a birthday party/ game night with Mark & Katelynn ( who just recently got engaged!)  Jerrica & Kellen, and Ashley & Braden.  We were planning on having a poker night because it was my 21st but that died quick when the girls got bored REALLY fast.. So we played 3 games! Catch Phrase, Buzz Word and Pictionary and played boys vs girls. It was a blast i am so glad that everyone could come over and celebrate with me! We even decided to start having a monthly game night with them since they all live in West Jordan we dont get to see them nearly as often as we would like to!

This is my fun birthday cake! 

November 9, 2011

Halloween 2011


I LOVE Halloween but...Halloween is EXPENSIVE!! So dressing up is not as fun as it was when I wasn't buying the costumes. The first Halloween Nate and I together 2009 I was in school and I dressed up as a spec ( from Horton hears a who) and Nate did NOTHING (boring yes i know). Last year 2010 I was working at Crafters Corner and lucky me who was the only one who didn't have kids i got to close so i got off just in time to catch up with Nate's family for truck or treat. THIS year Nate and I wanted to do something that wouldn't break the bank Halloween kind of has bad timing... The END of the month really when ALL the bills and due?? THEN 2 days later my BIRTHDAY! Which is basically the whole worlds birthday because SOOOOOO many people have the same birthday as me....So we decided to spend $10 what can you be for $10?? Well something you can make with a T-shirt. You can be m&m's!!

Ruffle Pillow

Here are the pillows that started this entire project i LOVE LOVE LOVE these pillows BUT i did NOT want to spend 29.00 a piece for them!! + shipping.. So i figured I could make them for cheaper than that!


I found this tutorial online and worked from there. http://www.spendinglesslivingmore.com/2011/04/21/diy-ruffle-pillow-tutorial/


I used a full size sheet for my fabric. I measured the pillow across the top so I could take into account the puffiness. It was 16 inches across so I added another inch and cut 2 17×17 inch squares.
I wanted the strips to have enough length so that when I ruffled them they would fit all the way across. I doubled the width {16} and cut 32 inch strips. I cut about 6 of them, enough to go across the pillow how I wanted.

I sewed down the middle of each strip. Then I pulled on one string to ruffle them. (This part didnt work for me so i used this tutorial instead to ruffle my fabric) Here’s how to make an easy ruffle.
Locate on your machine your tension dial and your setting for the length of the stitch. These are my settings.
First, set your stitch length to the longest stitch. Mine is 6.
Then set your tension to the tightest tension, or the highest number.
Now you should be all set.
When you stitch away it will automatically ruffle.

{aren’t they pretty?!}
I laid them out on one of the 17×17 inch squares to see where to lay them.

( at this point i started doing my own process because my sewing machine and i weren't getting along anymore...i pulled out my trusty hot glue gun and glue my ruffles down since i knew this was just going to be a decorative pillow i knew that wouldn't be a problem )
I marked with a yellow colored pencil where the seam of the ruffle went on the pillow,so I would know where to sew. I did that for each ruffle.

Here’s the back after sewing on all the ruffles. I put it face down with the other square and sewed 3 of the edges together. I just sewed a little bit on the 4th side so I could still shove the pillow in there.
Next I turned it ride side out and pushed the pillow in.

I sewed it closed, I didn’t really know what I was doing, but I just went for it!


I got a Single Sheet from Walmart for around $5 and a pillow insert for $6 this pillow cost me around $11 dollars so i saved around $18 by making it myself.


Here is mine i think it turned out pretty dang good! What do you think?!

Rosset Pillow Out of Large Tshirt

http://alisa-thesweetlife.blogspot.com
This is the tutorial i used for reference in making my Large tee shirt pillow

IMG_2735


You will start off by making your pillow cover and ruffles just like in
this post, but without stitching any ruffles on it. Go ahead and sew the opening shut and you are ready to make some rosettes to place on your pillow.

IMG_2744I made 4 big rosettes and 2 smaller ones. The larger ones take a couple strips of ruffle and the smaller ones only take one. So about 10 should do it. Keep in mind it will depend on the size of your pillow. Mine is only a 14” pillow so if yours is bigger, you might need more to make it look balanced.

IMG_2755For each rosette you will need a circle of felt or fleece cut into about a 3” circle. It doesn’t need to be exact {or perfect} it will be hidden and any extra will be cut off.  I used my high temp glue gun. I like the high temp because it adheres better and faster, but be careful or you might not have any finger prints left when you are done {not that I would know}.

IMG_2750First I took each strip of ruffle and rounded off the corners at each end so it would have a softer look.

IMG_2757Take your first ruffle and fold it in half lengthwise with the stitching on one side, creating a V shape with the ruffle. The stitching side is the part you will be gluing  down.

IMG_2759You will start with a  dot of hot glue in the middle of your felt piece.

IMG_2760Grab the end of your first ruffle and kind of swirl it around the end to make the center of your rosette. I like to put my finger through the middle of the ruffle {the V part} and push the stitching part onto the glue.

IMG_2761Once the center is adhered, make another short line of glue around the center part in the direction of your ruffle. {did that make any sense at all?}
You will just keep going around in a circle with your glue and your ruffle, pushing it into the glue to adhere it.  {this is way easier to do than to explain….promise}.

IMG_2762Here she is after one ruffle has been added. If this were one of the small rosettes I needed, I would take my scissors and cut around the bottom of the felt to remove any extra that wasn’t glued down and I would be finished.

BUT, this is one of my big rosettes, so I am going to add one more ruffle to make it even bigger. I just start adding it where I left off with the other one.

IMG_2771
Here she is all finished and ready to apply to my pillow.  IMG_2774
If there is still any bit of felt on the back side that hasn’t been glued, now would be the time to cut any of that extra off so you won’t be able to see it on the pillow.

IMG_2742To adhere the rosettes to your pillow, simply lay them out in  a design to your liking and hot glue each one to the pillow. Make sure you get plenty of glue around the edges so they don’t peel up. Nothin’ worse than peeling rosettes on your pillow.

IMG_2740


This one kinda was thrown together i had the wrong size insert when i glued on the flowers so it looked a little different than planned but that's ok! 

Burnt Edge Pillow

Continuing on my pillow kick since i am making all the pillows to finish my bedroom set. I used this tutorial for the flowers i places on the pillow. http://www.simplyvintagegirl.com/blog/index.php/2010/05/29/tutorial-how-to-make-lovely-fabric-flowers/

If you haven’t used those tea lights in a while, now’s the time! I hope you enjoy making these as much as we do . . . below are instructions with pictures on how to make your own.
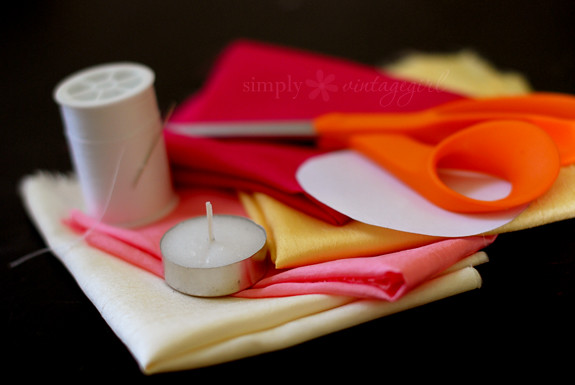
Fabric Flower Tutorial: Supplies
Supplies:
· Synthetic Silky Fabric
· Scissors
· Candle (preferably a tea light)
Additional supplies:
· Needle and Thread, Glue Dots or Glue Gun
· Buttons and/or Beads
Directions:
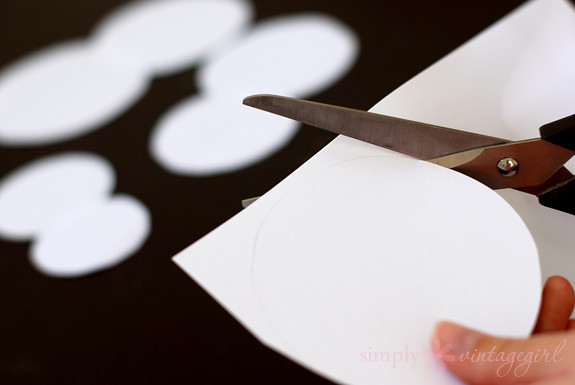
Fabric Flower Tutorial: Step 1
1. Cut circle patterns out of card stock. ( i used cookie cutters i already had that were different sizes)

Make the largest one’s diameter about half an inch larger than you want the diameter of the flower, as the petals will end up shrinking a bit. Create a few of these, lessening the diameter bit by bit so that the end result has smaller petals in the center and larger ones around the outside. You can also use a pattern here, which works very nice!
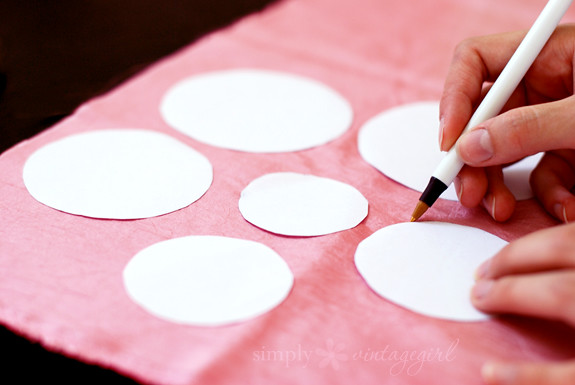
Fabric Flower Tutorial: Step 2
2. Trace around the pattern onto the silk fabric (using a pen).

You can also cut around the pattern and skip the drawing part, it just might not be as uniform . . . but with these, uniform isn’t necessary. And if it’s not uniform, it adds character. And character is good.
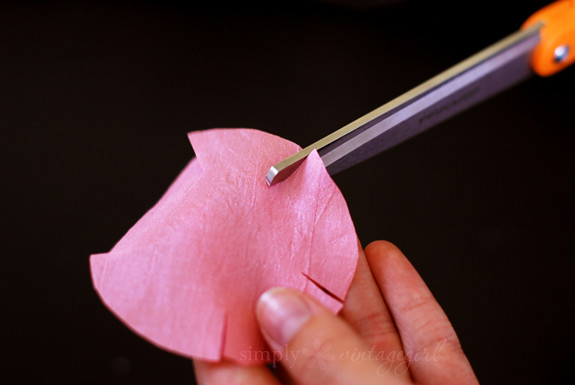
Fabric Flower Tutorial: Step 3
3. Take the scissors and cut out the circle and petals.
Cut just inside the drawn lines to make a circle out of the fabric. Carefully cut only about a third of the way into the circles to create the petals. You can do as many or few petals as you would like, or even add some variety to them. I cut five times, making five medium-sized petals. You can also round the corners of the petals, if you so desire.
Fabric Flower Tutorial: Step 4
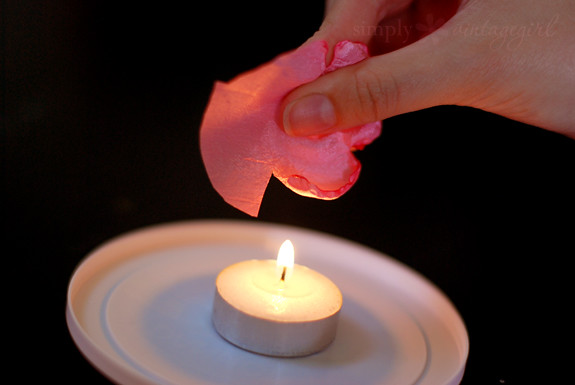
4. Use the lit candle to melt and crinkle the edges.
Be very careful (please have adult supervision, this is rather dangerous), as it is very easy to get burnt. Hold the cut petals about one to two inches above the flame, making sure to keep the circle rotating so that it does not overheat and catch fire. Continue to gently melt the edges of each petal until you have gone all the way around. Do this with each layer.
Fabric Flower Tutorial: Step 5
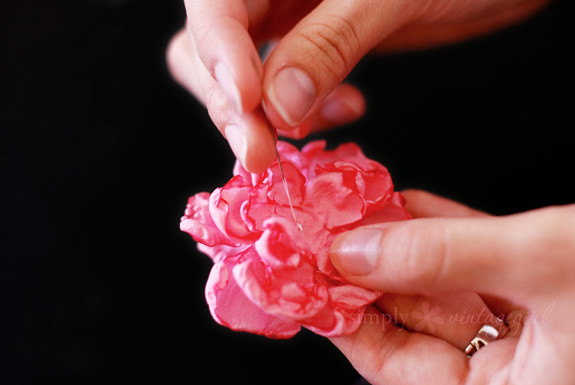
5. Sew (or glue) the petal layers together. (glue guns are my favorite!)
Using a needle and thread, create a beginning knot and then sew the layers together. You can come up through the top because the center  of the top layer can be covered by a button or  bead. To finish the flower, sew (or glue) the button or bead on top.
If you would like to add extra stability to the flower, you can sew or glue a piece of felt onto the back (make sure it is large enough to give good stability, but small enough so that it won’t be seen from the top).

After i made about 8 flowers and assembled them together i quickly threw together my pillow case. Using the same few steps from this post 
I love the colors all together and am so glad with how this pillow turned out! 6 dollar pillow insert and about 4 dollars worth of fabric!! AWESOME!